[Big News]Brorsoft's iPhone Data Recovery Entitled iRefone Released - 50% Discount Off

[Big News]Brorsoft's iPhone Data Recovery Entitled iRefone Released - 50% Discount Off
Get Brorsoft iRefone for Windows and Mac by joning Brorsoft Facebook Community activities. Click Like button, you can get 50% Off Promo Codes.

Tuesday, August 27, 2013

Best Alternative to Handbrake Mac to Rip DVDs on Mac Mavericks

Summary: This article will show you how to use the best Handbrake alternative Mac to rip DVD movies on Mac OS X (Mavericks and Mountain Lion) with ease.


Handbrake is a great freeware to rip DVD no matter on Mac or Windows. However, it is limited to rip homemade DVDs, which means the purchased DVD can't be ripped by handbrake as it is encrypted by CSS protection. Still want to rip DVD on your Mac easily with good video quality? Don't worry! Here the best Handbrake alternative for Mac is introduced to help you get all things done.

The best Mac Handbrake Alternative program I can recommend for ripping DVDs on Mac is Brorsoft DVD Ripper for Mac, which is highly compatible with Mac OS X 10.9 Mavericks, 10.8 Mountain Lion, 10.7 Lion, Snow Leopard 10.6, Leopard 10.5 and provides much more features than Handbrake. With it, you can fast and easily rip and convert protected DVDs and video to MP4, M4V, MOV, FLV, WMV, AVI, MKV, DivX, XviD, etc. for iPhone, iPad, iPod, YouTube, Apple TV, Samsung Galaxy Tab, etc. In addition, free lifetime update is available to let you run it in the latest Mac OS operating system like the coming Mac OS X 10.8(Mavericks). And for Windows users, please link to Brorsoft DVD Ripper. Now download this program and check out the steps on how to convert DVD with the best handbrake alternative mac.

How to Rip DVDs with Handbrake Alternative on Mac OS X

Step 1. Import DVD files

Launch the best Mac Handbrake Alternative and click disc button to load DVD files to the source pane. Select your preferred subtitles from the Subtitles option.


Step 2. Choose output format

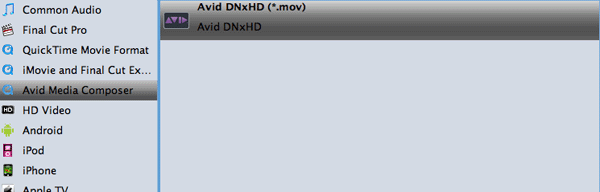
Click the Format bar and choose your desired format from the drop-down list. Various output formats like MP4, MOV, MKV, FLV, WMV, AVI, etc. are provided. Moreover, kinds of presets for portable devices and video editing software like iPhone, iPad, iPod, iMovie, Final Cut Pro, Samsung, HTC, Motorola, etc. are provided to help you get videos with optimized settings to best fit your devices or software.


Tip: If you want to customize the output video quality, you can click the "Settings" button to open the Settings window and set video resolution, frame rate, bit rate, codec, etc.

Step 3. Start conversion

When all settings are OK, simply click the "Convert" button to begin converting your DVD on Mac OS X using Handbrake Alternative. When the conversion complete, you can get the converted videos and play/share them anywhere you like.

Editors' note: With decent decrypting capability, high quality video output and considerate backup solution and specific format templates for versatile PMP devices (iPad, iPhone, Apple TV, Xbox, PS3, Android tablets and phones, etc), Brorsoft DVD Ripper ranks top on the DVD ripping application list. Meanwhile Brorsoft provides excellent customer support service, including lifetime free upgrade of product and technical support. Users can contact the support staff via email for help and suggestion.

More Guides:

How to rip DVDs to play on Android tablet/phone
How to rip and import DVD to iTunes
How to Rip DVD discs in Windows 8
Fast Backup DVDs with original structures
Tips to Speed up DVD Ripping Process
How to put and play AVI/MKV/VOB files on Google Nexus 7

Thursday, August 22, 2013

Canon XF305/XF300 50Mbps MPEG-2 4:2:2 codec with Sony Vegas Pro

Summary: The Sony Vegas Pro won’t import MXF files from Canon XF105, XF300, XF305. The easy workaround is to transcode MXF to Sony Vegas Pro “edit” friendly format.


The Canon XF series camcorders employ the XF Codec, an MPEG-2 4:2:2 50Mbps codec for native 1920 x 1080 HD video recording onto affordable, universally available Compact Flash (CF) cards. Uniting video, audio and metadata into a single file, Canon XF305 and XF300 use an MXF (Material eXchange Format) File Wrapper, a widely supported open-source format, to maximize compatibility with existing industry infrastructure; while, it’s still not widely supported by the non-linear editing (NLE) systems. Many users have met the Canon XF300/XF305 to Vegas Pro issues.

To solve the problem is a effective way, what you should know that: MXF is a self-container format which is unacceptable by various non-linear editing systems (NLE), like Pinnacle Studio, Final Cut Pro (FCP 6/7/X), Sony Vegas, Avid Media Composer, Premiere, etc. In order to import the MXF files from Canon cam to Sony Vegas Pro for editing, the easy workaround is to transcode Canon MXF files to Vegas Pro Pro most compatible video formats. Along with some help from a top MXF Converter, it can be done. To help those who wanna edit MXF files in Pinnacle Studio without problems, here I share with you a simple guide on how to convert MXF files for smooth editing in Sony Vegas Pro.

Solution: Download and install Brorsoft MXF Converter

With it, you can easily convert Canon MXF files from XF100/XF105/XF300/XF305 MXF files to MPEG-2, the best codec ensuring the best results when using in Sony Vegas Pro. Besides it, it can also export the best editable format for Pinnacle Studio, Avid Media Composer, Windows Movie Maker, etc. Check a step-by-step instruction on how to convert Canon MXF files to MPEG for Sony Vegas Pro 11/12.

Step 1. After downloading, install and run this Canon MXF file converter, just copy the MXF files from the CF cards right to your hard drive, import the files to the software.

Note: You shouldn’t move the single MXF video out of the whole MXF whole structure folder, or the MXF video would be wrong such as without audio.


Step 2. Click on the dropdown menu of “Format” and then move your pointer to Adobe Premiere/Sony Vegas > MPEG-2, which is the Sony Vegas compatible video format. Afterwards, you can set the output folder.

Tip: Click the “Settings” icon and you will go into “Profile Settings” interface. You can adjust codec, bit rate, frame rate, sample rate and audio channel according to your needs and optimize the output file quality.


Step 3. Click “Convert” button to start transcoding Canon XF305/XF300 50Mbps MPEG-2 4:2:2 codec MXF to MPEG-2 for importing to Sony Vegas Pro.

After the conversion is finished, just run Vegas and import the generated mpg files. You will find the output video work perfectly on Sony Vegas Pro 10/11/12.

Additional Tips:

1. Click Edit button and you can deinterlace 1080i Canon MXF files for Sony Vegas via checking off the “Deinterlacing” box in the Video Editor.

2. If you wanna handle your Cano XF100/XF105/XF300/XF305 MXF files on Mac with iMovie, FCE, Adobe Premiere Pro, etc, Brorsoft MXF Converter for Mac is the utility for you.

3. Learn more MXF tips and tricks from Brorsoft MXF forum.

Related tutorials:

FAQ & Answers: Canon XF Plugin for Final Cut Pro (X)
Transcoding Canon MXF footage to DNxHD for Avid MC
Solve Canon C300 MXF to Adobe Premiere Pro CS6 issues
Import Canon XF300 MXF files to FCP X on Mac OS X
Convert Canon C500 MXF files to ProRes 422 for FCP 6/7 on Mac
Import Canon XF305 MXF to FCP on Mac
Importing Canon Vixia HF G10/G20 to Mac Avid Media Composer
Canon C300 Workflow - FCP, iMovie, Premiere Pro, Avid
Premiere Pro CS5.5/CS4/CS3 and Sony PMW-EX1R Workflow
Import Canon EOS Rebel T3i (600d) & T4i (650d) MOV to WMM
How to open and edit .AVI files in Pinnacle Studio
Gopro MP4 rendering issue with Sony Vegas Pro

Monday, August 19, 2013

Sony NEX-5/5N AVCHD 2.0 & iMovie-Transcode Sony NEX-5/5N MTS files to AIC for iMovie on Mountain Lion

Summary: Follow this guide below you will get to know the Sony NEX-5/5N AVCHD 2.0 to iMovie best workflow, so you can import Sony NEX-5/5N footage to iMovie without any trouble.


I've been testing the Sony Alpha NEX-5 and NEX-5N camera and had to figure out a workflow to manage the video they capture. One of the formats that Sony uses for movies is AVCHD, which can be difficult when working with iMovie on a Mac. Fortunately, I have a few tips to make it easier.

Generally, update to iMovie’11 (version 9.0.1 and later), you can easily import Sony NEX-5N, NEX-5 60i MTS shootings using Camera Import, but some video playback or audio problems may still exist. Plus, you probably will encounter problems when you want to ingest 60p footage from Sony NEX-5N to iMovie. The reason that you can’t successfully import those recorded AVCHD 2.0 footages on 1080p60 to iMovie is limited by iMovie itself. Currently 1080/60p footage is a very non-standard format and it’s unsupported in iMovie 8/9 even the latest iMovie’11. Take into account these existed or potential issues, you need transcode AVCHD to Apple Intermediate Codec(AIC) encoded .mov format first, which is a native format for iMovie 8/9/11. It’s a great way to achieve your goal smoothly.

Guide on Converting Sony NEX-5/5N AVCHD 2.0 to AIC .mov for iMovie

The quick workaround is to use the easy-to-use yet professional app Brorsoft MTS/M2TS Converter for Mac which can be used as a Sony AVCHD MTS Converter under OS X Leopard (10.5), Snow Leopard (10.6), Lion (10.7), Mountain Lion (10.8). It is free, clean and safe to install and use. With it, you can fast convert MTS recordings from Sony NEX-5/5N to AIC .mov for iMovie, as well as Apple ProRes for FCP, DNxHD for Avid Media Composer, etc. Now download and go through the whole conversion process.

Step 1: Load NEX-5N/5 AVCHD files to the software

Run the best MTS Converter for iMovie and you can click either ‘Add Video’ button or ‘Add from folder’ button to load source .mts or .m2ts files. If you want to combine the loaded AVCHD clips into one file, simply tick off the checkbox before ‘Merge into one file’.


Step 2: Choose output format for iMovie

Click the format bar, and move mouse cursor to “iMovie and Final Cut Express -> Apple InterMediate Codec (AIC) (*.mov)”, which is the best editing format for iMovie program.

Tip: To get better video quality for editing AVCHD in iMovie, you can click ‘Settings’ button to set video resolution(1920×1080/1440×1080/1280×720/720×480), bitrate(from 1Mbps to 20Mbps), frame rate (24p/25p/30p) as you want.


Step 3: Start encoding AVCHD to AIC .mov

Click the convert button under the preview window, and the MTS to MOV converter program will start converting Sony NEX-5/5N AVCHD MTS to iMovie AIC .mov format on Mac OS X.

After the conversion, you can click “Open” button to get the generated QuickTime AIC .mov files effortlessly. Afterwards, launch iMovie, and click File > Import > Movies to add the output files to iMovie for editing. Now you can edit Sony NEX-5/5N AVCHD footage in iMovie 8/9/11 without any issue.

See also:

Import 1080 60p/50p AVCHD Footages to Final Cut Pro
How to ingest Sony 50p/60p AVCHD footage to Premiere Pro
How to Convert Sony Handycam Files on Mac and Windows
Import Sony NEX-VG20 50p AVCHD into FCP 7 on Mac OS X
Converting M2T files to Apple ProRes for Final Cut Pro
Use Sony NEX-VG20 AVCHD 2.0 footage in Premiere Pro
Enable Sony PMW-150 50Mb/s MXF to work with Premiere Pro
Natively edit Panasonic V700 1080/50p 60p MTS in FCP
Convert Canon T3i/600D footage for editing in iMovie

Tuesday, August 13, 2013

Convert Panasonic P2 MXF files from AG-HPX250 to FCP/Avid/Premiere/iMovie

Summary: Along with Brorsoft's P2 MXF Converter for Mac, you can easily convert and import Panasonic AG-HPX250 MXF footage into Avid MC, Premiere Pro CS5/CS6, Final Cut Pro (X) and iMovie for further editing on Mac (OS X 10.9 Mavericks included).


Panasonic AG-HPX250 P2 HD Handheld Camcorder has become the hotly received P2 HD camcorder among Panasonic's broadcasting and professional P2 HD Series. This article is mainly to solve the AG-HPX250 recordings to FCP, Avid, Premiere, iMovie importing problems. As many users get HPX250 camcorders, more problems are coming up: some of them have the need to import Panasonic AG-HPX250 MXF to FCP X or Adobe, Avid, iMovie for editing on Mac OS X, but they always meet the importing issues.

As far as I know, (P2) MXF is not a good editing format for NLE system including iMovie, Final Cut Express, Final Cut Pro, Avid Media Composer, Adobe Premiere Pro, etc. Then how to import Panasonic AG-HPX250 videos to iMovie, FCP, Avid for editing without any issue? Well, if you make the recordings editable before taking to the program, the incompatible error won’t happen any more. Here you can download and apply Brorsoft MXF Converter for Mac to achieve the goal in a fast way.

This Panasonic P2 MXF Converter for Mac is the solid tool to help users make the P2 MXF transcoding on Mac OS X. It offers the optimal preset profiles for Final Cut Pro 6/7 and FCP X, Avid Media Composer, Adobe Premirere Pro, iMovie, FCE and more. And there is no need to worry about the quality loss.

Below is the simple guide about how to convert Panasonic AG-HPX250 footage into Avid, Premiere, iMovie, FCP

STEP 1: You need to download, install and run the smart Panasonic P2 MXF Converter Mac and transfer your MXF recordings to the program from the P2 card.


STEP 2: Click on the “Format”bar and choose a best editable format.

a. Select Final Cut Pro > Apple ProRes 422 (*.mov) as the output format for Final Cut Pro.


b. To edit Panasonic AG-HPX250 footage in Avid MC, choose Avid Media Composer->Avid DNxHD(*.mov).


c. For iMovie, choose iMovie and Final Cut Express > Apple Intermediate Codec(AIC) (*.mov).

d. For importing Panasonic AG-HPX250 MXF to Premiere Pro, please select Adobe Premiere/Sony Vegas > MPEG-2 (*.mpg).

PS: You also can click “Settings” to set video frame rate, video size and Video Bitrate as you want.

STEP 3: As soon as all things are finished, please click “Convert” button to start the Panasonic P2 MXF conversion on Mac OS X.

Once the conversion is 100% completed, you can smoothly copy the converted files to FCP/Avid/Premiere/iMovie.

More Guides:

How to Merge MXF files
Panasonic AG-HPX500 to FCP Workflow
Import MXF clips into FCP without losing audio
How to import P2 footage into Final Cut Pro using P2 Card
Load Panasonic AG-HPX250 P2 MXF files to Avid 7
Transcode Panasonic AG-HPX250 P2 HD MXF to Apple ProRes for FCP X
Import Panasonic AG-HPX250 P2 HD MXF files to Adobe Premiere CS5.5
Rip and Convert Blu-ray and DVD discs to Windows 8 OS
Top 5 Blu-ray Ripping Programs Ranking and Review
Importing GoPro HD Hero2/Hero3 video to Sony Vegas Pro
Import Panasonic HC-V720 AVCHD shootings to iMovie
Edit Panasonic HC-X900 AVCHD 1080p Recodings in iMovie/FCP X
Panasonic Lumix DMC-LX7 Workflow: Avid, FCP, iMovie, Premiere Pro

Wednesday, August 7, 2013

Best Windows 8 Blu-ray Ripper-Rip Blu-rays/DVDs in Windows 8

Summary: If you are looking for a way to getting Blu-ray, DVD onto Windows 8, you’re in the right place. This tutorial provides detailed instruction about how to rip and copy DVD and 1080p Blu-ray movies on Windows 8.


Blu-Ray and DVD are common source for our daily entertainment, but BD/DVD has more copy protection than any other format around, and playing it on your Windows 8 computer can be difficult. Here's how to rip Blu-ray/DVD movies in Windows 8 for glorious HD movies, anywhere you want them.

Apart from its very heavy copy protection, if you want playing Blu-ray, DVD discs on Windows 8, you also need to convert these Blu-ray/DVD files to a playable video. Luckily, Brorsoft Blu-ray Ripper can help you achieve your goal.

So by ripping your Blu-Ray, DVDs with this Windows 8 Blu-ray ripping tool, you can still get that amazing HD quality on any Windows 8 computer you want. With it, you can convert the commercial Blu-ray, DVD movies to MP4, AVI, MKV, FLV, MOV, MPG, etc for playing on Window 8 PC without any limit. Besides, it provides hundreds of video presets for portable devices like Apple TV, iPhone, iPad, Samsung, Acer, Toshiba, etc to meet your needs. If you wanna rip Blu-ray, DVD on Mac OS X(Lion, Mountain Lion, Mavericks), please turn to Blu-ray Ripper for Mac.

Download the tool and follow the tutorial on ripping Blu-ray/DVD collections in Windows 8.

1. Load Blu-ray/DVD movies

Run the best Blu-ray Ripper for Windows 8. Insert the BD, DVD disc to the drive and click the "Load files" button to add the Blu-ray, DVD movies you want to convert. Note that you can also add ISO/IFO files.


2. Decide output video format

Click Format bar and you'll see the format list below. Simply select one you prefer as the output format.


Tip: You can click "Settings" to change the video resolution, bit rate, etc. for playback on Windows 8 with the best quality.

3. Start ripping Blu-ray/DVD in Windows 8

When all necessary settings are settled, click the Convert button to start converting Blu ray, DVD on Windows 8 to the video format you’ve selected automatically.

After the conversion, click "Open" button to locate the ripped Blu-ray, DVD files and easily play them on your Windows 8 PC or transfer to portable devices for watching anywhere you like.

Additional Tips:

If you wanna a powerful all-in-one tool to convert videos, Blu-ray movies and DVDs to your (Windows XP/Vista/Windows 7/Windows 8) PC or portable devices like Google Nexus 10/7, Kindle Fire HD, Samsung Galaxy Note 2, Galaxy S3/4, Galaxy Tab 2 10.1 at the same saving time and effort, the all-in-one Blu-ray Video Converter Ultimate program will be a nice choice for you. If you are on Mac OS X, please get iMedia Converter for Mac.

See more:

How to import Blu-ray to Final Cut Pro
How-To Rip DVD videos to Use Over DLNA
Convert DVDs for playback on Galaxy Tab 3 8.0
How to Rip DVDs to Coby Kyros tablet
How to Rip and Upload DVD Clips onto YouTube
How to rip DVDs to play on Android tablet/phone
Howto sync movies to Samsung Galaxy Note 8.0
Downloading DVD, Blu-ray and 1080p HD movies to Google Nexus 10
Convert Sony EX1/EX3 MP4 clips to DNxHD for Avid MC
How to Edit GoPro video with Windows Movie Maker?
Rip DVDs for Editing in Avid Media Composer
How to Convert MPEG-2 files for Editing in Final Cut Pro X

Thursday, August 1, 2013

Work with Sony HDR-PJ790V/PJ780/PJ650V AVCHD in FCP X perfectly


Summary: This article is about the tutorial how to import and edit Sony Handycam HDR-PJ780/PJ790V/PJ650V AVCHD in Final Cut Pro X on Mac.

Sony HDR-PJ780, PJ790V and PJ650V came to latest range of Sony Handycam Full HD digital cameras. These new Handycams are featured with the powerful image stabilizer inside, makeing the footage and the transitions steady and smooth. You can record 1080/60p/24p AVCHD shootings with the PJ790V/PJ780/PJ650V Handycam camcorder, sharing your memories virtually anywhere.

After recording some 1080 60p footages, you probably would import AVCHD from Sony Hanycam to Mac for editing with Mac tools like Final Cut Pro X. While, importing problems occurred as the FCP X can't import Sony PJ790V/PJ780/PJ650V recorded 1080 50/60P AVCHD video, the frame rate is so high and the AVCHD codec is not friendly to FCP for editing. And as we know Apple ProRes codec is the natively supported by Final Cut Pro. So, you'd better transcode Sony HDR-PJ790V/PJ780/PJ650V AVCHD to ProRees 422 for Final Cut Pro X first.

Brorsoft MTS/M2TS converter for Mac is the possible solution for you, which is the tool that can deal nearly all kinds of 1080p, 1080i, 720p MTS videos from Sony, Canon, JVC, Panasonic camcorders. With it, you can convert Sony PJ790V/PJ780/PJ650V MTS files for FCP X natively editing on Mac with the ProRes .mov output format. Besides, with this Mac MTS Convert program, you can transcode MTS/M2ts to an editable format like AIC for iMovie/FCE, MPEG-2 for Adobe Premiere, DNxHD for Avid Media Composer and more. Download and follow the step-by-step tutorial below.

Note: Before you try to do the conversion, don’t forget to make sure that you have installed the Apple ProRes Codec manually since the FCP X asks users to install it by themselves.

Step 1: After downloading, install and run this MTS to FCP X Converter, just copy the MTS files from your camcorder to your hard drive. Import the files to the software for converting.


Step 2: Click the “Format” option and choose “Final Cut Pro > Apple ProRes 422 (*.mov)” as the best codec for FCP X on Mac.


Tip: You can also click “settings” button in the main interface to customize the output video’s parameters, such as resolution, frame rate, etc. In usual, 1920*1080 video size, and 30fps video frame rate is recommended for editing Sony handycam MTS video in Final Cut Pro.

Step 3: Click the “Convert” icon to start to convert Sony Handycam AVCHD to Prores MOV for FCP X on Mac OS X

Once the conversion finished, click the “Open” button to locate converted files, then load ProRes .MOV files in FCP X. Now you can successfully and easily import Sony HDR-PJ790V/PJ780/PJ650V 1080 60p MTS footage to FCP X for smooth editing.

Additional Tips:

To get more Canon, Panasonic, Sony, Nikon, GoPro camera video importing and editing solutions, please link to Video camera Tips and Tricks.

See also:
Sony Handycam to Avid Media Composer: HDR-PJ790V/PJ780/PJ650V
How to Convert Sony Handycam Files on Mac and Windows
Import AVCHD videos from Sony Handycam 1080p to Mac for editing
Sony HDR-PJ580V AVCHD to Adobe Premiere Pro
Convert HDR-CX260V/B AVCHD to AIC MOV for iMovie
Sony Handycam HDR-PJ790V/580V to Avid/Premiere Pro Workflow
Smoothly Editing AVCHD (.mts/.m2ts) footage in Premiere Pro
Canon EOS C300/MXF work with Premiere Pro CS6
Using Sony NEX-VG20 AVCHD in Sony Vegas Pro 9/10/11/12 workflow
Importing video from Canon VIXIA HF M31 into FCP X
Get Canon T3i videos compatible with Windows Movie Maker