[Big News]Brorsoft's iPhone Data Recovery Entitled iRefone Released - 50% Discount Off

[Big News]Brorsoft's iPhone Data Recovery Entitled iRefone Released - 50% Discount Off
Get Brorsoft iRefone for Windows and Mac by joning Brorsoft Facebook Community activities. Click Like button, you can get 50% Off Promo Codes.

Monday, March 31, 2014

How to Get all DVDs into Plex Media Sever for Streaming

Summary: Have a big DVD collection, how to handle it? Here is a simple guide on how to backup and stream your own DVD collection on Plex Media Server easily by ripping DVD to Plex.


If you like me have 800-900 DVDs and want to put them into some format so you can share them into Plex, just read on this article. I will share the tips and tricks for copying and streaming DVDs to Plex Media Server.

To get DVD collection to Plex, what you need to do is to rip DVD into Plex Media Server friendly format. Brorsoft DVD Ripper is the bee's knees, which can help you finish DVD conversion bypassing DVD copy protection. With it, you can convert DVD to almost all regular video formats like MP4, MOV, MKV, FLV, WMV, AVI, etc. and even extract MP3, WMA, FLAC, OGG, etc. audio from DVD movies. Best of all, it allows you to copy your DVD to hard drive with original structure or main movie only. If you're using a Mac, please turn to DVD Ripper for Mac, which enables you to convert DVD to Plex Media Server on Mac OS X (Mavericks).

DVD to Plex Media Server
Conversion Steps:

 1. Insert your DVD disc to the drive, then launch the DVD ripping software and click the "Load Disc" button to have the DVD content imported. You can also add VIDEO_TS folder, DVD ISO files are the source files for converting.


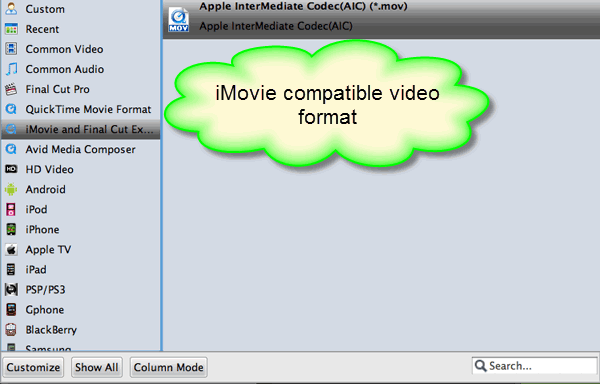
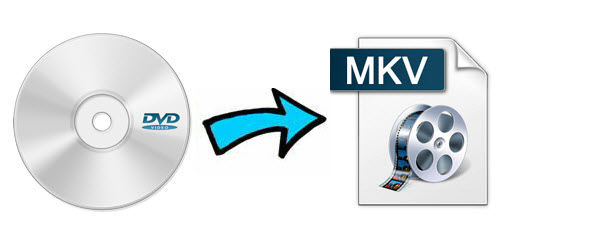
2. Click Format bar and choose MP4 from Common Video, which can be recognized by Plex well. MKV is also a good choice; as a container format it takes whatever you give it.


Tip: With the right settings you can retain the quality of the original DVD while also saving space. This is particularly helpful when streaming over your network, depending on your network quality. Simply click Settings bar and you can tweak the settings to your satisfaction and even save it as preset.

3. Finally, hit the "Convert" button at the bottom of the main interface to start the conversion. It will automatically convert DVD/ISO to Plex Media Server compatible video files.

Once the conversion is finished, click "Open" to quickly find the converted movies. Then, Plex will recognize, catalog, play and stream these DVD files at ease.

See more:

How to Rip DVD with Right Subtitle
How to Rip and Import DVD to iTunes
Play Tivo Shows via Plex Media Server
Guide: Fast convert M2TS to the Apple TV 4/3/2
Convert windows media center TV recording to Plex
How to convert and play MKV via Plex Media Server
Steps to convert Blu-ray to play via Plex Media Server
VOB playing issue- Watching VOB movies on Mac OS X
Transcoding VOB to ProRes that works natively within FCP X
How to convert MVI to Samsung Galaxy Tab or Galaxy Note Tablets Playback?

Wednesday, March 26, 2014

iMovie Tips for Editing DVD files-How to import DVD format into iMovie 11/09/08

Q: " I used DV to capture some video, after that i tried to import those video into iMovie and come with error message.

which means iMovie 11/09/08 not support DVD format or something I was missed... please give me a hand!!! "

Okay, following the below pages to check out the best solution for
Ripping DVD movies to edit in iMovie highly compatible video file formats with the best quality.

Apple's iMovie is welcomed by all Mac users for home movie making which allows people to edit video clips, add sound and voiceover tracks and share movies in various ways.If you've tried to import DVD to iMovie, you may find that the DVD files grey out. Why? That's because iMovie only supports MPEG-2, AVCHD, DV-Standard, HDV (High Definition Video), QuickTime Movie and MEPG-4 formats, but DVD is not supported. If you also are looking for ways to load DVD to iMovie for further editing, you'd better to convert DVD to iMovie compatible video formats first. And here Brorsoft DVD Ripper for Mac is highly recommended to you.

It is a powerful DVD ripper, converter, editor and player. It offers an optimized iMovie preset for easy access. With it, you can easily rip and convert DVD to Apple Intermediate Codec .MOV, which ensures maximum editing quality and efficiency when working with iMovie. The all-in-one toolkit can also rip DVD disc, convert DVD VIDEO_TS folder, ISO/IFO files to all popular video format like AVI, MKV, VOB, WMV, FLV, etc. for convenient editing and playing on Mac OS X (Mavericks and Mountain Lion included). Besides, this program also supports some video editing functions. With these functions, you can crop the frame size, add watermark, load subtitle, merge several videos into one file, etc. Just follow the guideline below, you can convert and import DVD movies to iMovie easily and successfully.

How to convert DVD to iMovie compatible AIC .mov

1. Load DVD files

Run the DVD to iMovie Converter. Insert your favorite DVD on the DVD-ROM and load your DVD files to the software through DVD disc icon. Alternatively, you can hit "IFO/ISO" to import DVD ISO/IFO files.


2. Select the output format

Click "format" bar, choose iMovie/FCE -- > Apple InterMediate Codec(AIC) (*.mov) as the output format. The output video can be imported to iMovie 11/iMovie 09/iMovie 08 directly.


Tip: Furthermore, you are provided some useful edit functions cropping, trimming, adding watermark, attaching subtitles for pre-editing your video files so that you can simplify your iMovie editing.

3. Start the DVD to iMovie conversion

After all the settings are done, click the Convert button to start converting your DVD movies to AIC MOV for iMovie.

After the conversion, click "Open" to locate the result videos and then launch iMovie, choose File > Import > Movies..., to import the converted DVD files into iMovie and prepare for editing.

Related Articles:

How to Import DVD to iTunes
How to Ingest DVD clips to Final Cut Pro
Easiest way to encode (5.1) AAC to (5.1) AC3
How to import video from Blu-ray to Avid Media Composer
Fast Convert and Import VOB files into Sony PlayStation 3
Bring Sony EA50UH AVCHD footage to Final Cut Pro 7(FCP X)

Tuesday, March 18, 2014

DVD to MKV Guide- How to rip from DVD to MKV and get each chapter separately

Summary: This full guide tells you how to complete the DVD to MKV lossless conversion with the original quality in a simple way.


I am searching already 5 days to find a tool that can help me to rip a DVD(or some part of a DVD) into MKV and also I don’t want to lose quality. Was trying to do with some DVD rippers(MakeMKV) on the market but the MKV mux is not working there for me also others are stuck in 0.47% or so. In one word I need a DVD ripper can bring me lossless DVD to MKV conversion. Well, luckily enough I’ve found certain DVD ripping software a moment ago that can meet my needs. If you are just planning to convert DVD to MKV, learn the tips below.

Many people complain that the video quality is not as clear as the original DVD after they ripped. In fact, with the right program, you can get all done easily and quickly. Here I highly recommend Brorsoft DVD Ripper to help you batch convert MKV files to MP4 without quality loss.

It’s a professional DVD converter that can convert and rip DVD to MKV videos with subtitles in Windows (Windows 8). What I’d to stress, it really gives me output videos with the same quality as original. More than that, it also can rip DVD, DVD ISO to MP4, MOV, WMV, FLV, etc. The Mac version DVD Ripper for Mac is also to rip DVD movies to MKV on Mac (Mavericks and Mountain Lion included).

How to easily convert DVD to high quality MKV

1. Insert your DVD disc to the drive, then launch the DVD ripping software and click the “Load Disc” button to have the DVD content imported.

Note: If you just want to rip some chapters of your DVD to MKV, check the title of the each chapter for converting. Choose the subtitles and audio track as you like.


2. Select “MKV(Matroska) Video (*.mkv)” as output format from “Common Video” category under the drop-down list of “Format”. If you want to get better HD video quality, just select “MKV HD Video (*.mkv)” from “HD Video” category.


3. Hit Start button to start conversion. During the process, you can view detailed progress info, and preview the progress with real time images. OK. Leave the rest to best DVD to MKV Converter, and everything will be done very quickly.

More Guides:

How to Digitize Your DVD Collection Easily and Fast
Convert Blu-ray to MKV for HD Backup Keeping 1080p
How to convert MKV to AVI with Subtitles
How to Rip DVD to Stream over UPnP server
PS3 MKV Solution: Easily Convert MKV to MP4 for PS3
Best Settings for Editing VOB files in Premiere Pros

Monday, March 10, 2014

Plex Blu-ray Ripper- The Best way to rip videos off Blu-ray for Plex Media Server

Summary: This article offers a brief instruction about how to get Blu-ray movie disc free on Plex Media Server for streaming to Roku, Xbox 360, PS3, Android/iOS devices.


I'm about to the point where I want to rip my Blu-ray Collection to Plex Media Server and am wondering what would be the best way to go about it? In fact, I would say I’m somewhat of a Blu Ray ripping novice. I've never streamed one. I usually use the disk. I've been experimenting with streaming from Plex to Roku and it hasn't been a good experience so far.

Searched widely and I got some tech support for getting Blu-ray movie into Plex Media Server for streaming and playing correctly.

1. Find a good Blu-ray ripping tool
2. Convert Blu-rays to a common video format
3. Backup Blu-ray rips to Plex Media Server

I found Brorsoft Blu-ray Ripper which aims to solve this problem by giving us the ability to store our purchased physical Blu-ray and DVD discs or downloaded media to local computer, hard drive then stream over a home network for Plex Media Server and iPad, Samsung Galaxy S3, Roku, Xbox 360, PS3 playback. It's professional in ripping and converting Blu-ray/DVD discs, Blu-ray/DVD ISO image, Blu-ray/DVD copies and more. It will help you backup your Blu-ray disk and save the time looking for them from the cardboard with ease. If you are working on Mac OS X, please get Blu-ray Ripping software for Mac.

Here is the step-by-step guide on ripping, converting Blu-ray to Plex Media Server.

Step 1: Load Blu-ray movies Insert your Blu-ray disc into your BD drive, run the Blu-ray Ripper for Plex and click "BD/DVD disc" icon to load movies.


Tips: Before start converting Blu-ray, you can backup your BD contend first. There are two options for you:
a. Backup Blu-ray with original structures;
b. Copy movie only from Blu-ray discs

Step 2: Choose output format Click the "Format" option, and choose MPEG4, MOV from Common Video profile list. If you want to keep 1080p resolution as source movie, you can choose HD Video > H.264 HD Video(*.mp4) for Plex Media Server.

Note: The output format is preferably in a common format, like MP3 for audio, MPEG-4 for video. The more common format you use, the more devices you can stream to. For example, if you use FLAC instead of MP3 for your music, you can't stream to your Xbox 360. Just keep in mind that not all devices support all formats of media.

Step 3: Start Blu-ray to Plex ripping Click the convert button under the preview window, and the Blu-ray ripper will start the conversion from Blu-ray DVD movies to MP4/MOV for Plex Media Server.

After conversion, you can stream Blu-ray movies through Plex Media Server to HDTV, PS3, iPad or other DLNA-compliant devices. Enjoy.

More Guides:

How to Compress file size of Blu-ray movies
How to Rip/Convert Blu-ray to MKV for HD backup
How to copy Blu-ray movies to NAS for streaming
How to fast rip and backup DVD films to NAS
Tips and tricks for adding subtitles (SRT, ASS, SSA) to a .MKV file
Convert AVCHD Lite to MPG video for using in Adobe Premiere Pro

Sunday, March 2, 2014

How about the MP4 and Adobe Premiere Pro compatibility?

Summary: Failed to import MP4 files to Adobe Premiere Pro for smooth editing? Fortunately, there is an easy way to fix the issue. Let's find it out here.

In this article, you will learn the best way to import and edit .MP4 files in Adobe Premiere Pro without rendering on Mac. Just follow it.


Generally, we would like to use video editing programs like Adobe Premiere Pro to edit MP4 videos, including YouTube MP4 videos, iTunes MP4 videos, Sony XDCAM EX MP4 Camcorder videos, etc. in order to get better videos or more wonderful video files. Well, Adobe Premiere Pro might not work with some MP4 files sometimes due to the codec issue or other reasons. In this case, to smoothly edit MP4 in Premiere Pro, the easy workaround is to convert MP4 to MPEG-2 which is the best codecs with best results when working with Adobe Premiere Pro. For this purpose, this article will guide through how to rewrap and transcode 1080p/720p .mp4 to .mpg in details.

The quick and effective workaround I’ve worked out is to use the easy-to-use yet professional app Brorosft Video Converter for Mac which can be used as a Mac MP4 to Premiere Pro Converter under OS X Leopard (10.5), Snow Leopard (10.6), Lion (10.7), Mountain Lion (10.8), Mavericks (10.9). With it, you can effortlessly transcode 720p/1080p MP4 files to MPEG-2 video for Adobe Premiere Pro CS3/CS4/CS5/CS6, and it works well and converts flawlessly. Meanwhile, the Mac Video Conversion tool can create files compatible with various non-linear editing systems like Avid, FCE, FCP, iMovie, and Adobe Premiere Elements, etc. For encoding MP4 to Premiere Pro friendly video on Windows, try Video Converter. Below is how.

How to convert and import MP4 into Adobe Premiere Pro on Mac?

1: Load MP4 files to the Program

You can directly drag and drop the MP4 files to the software, or click "Add" or "Add From Folder" to locate the MP4 files into the MP4 converter for Mac.


Tip: Check the "Merge into one" box, you can join several MP4 clips together.

2: Choose output profile

Select “Format” pull down list to select Adobe Premiere/Sony Vegas> MPEG-2(*.mpg) as the best video format for Premiere Pro.


Tips: You can click “settings” button in the main interface to customize the output video’s parameters, such as resolution, frame rate, etc.


3: Start MP4 to Adobe Premiere Pro conversion

Click the big "Convert" button at the bottom right corner, this Mac video converter will start to convert MP4 to .MPG for Premiere Pro! Once the conversion completes, you are free to use MP4 files in Adobe Premiere Pro CS4/CS5/CS6/CC7!

Additional Tips:
1. Before the conversion, you can edit the MP4 videos. By clicking “Edit” button, you can trim, crop the video, or add watermark and adjust effect to the videos which you will convert.

2. If you want to edit .mp4 in iMovie, you just need to choose the “iMovie and Final Cut Express -> Apple InterMediate Codec (AIC) (*.mov)” in the second step. For converting MP4 to Final Cut Pro, you need to choose "Format > Final Cut Pro > Apple ProRes 422 (*.mov)" as the best codec.

Read More:

Importing TiVo TV shows to Adobe Premiere
How to fast rip and backup DVD films to NAS
Simple tutorial to upload GoPro video to YouTube
Importing AVI files into Adobe Premiere Pro CS5/CS6
GoPro MP4 to Final Cut Express Basic Import Workflow
Convert H.264 files to MPEG-2 for Adobe Premiere Pro