![[Big News]Brorsoft's iPhone Data Recovery Entitled iRefone Released - 50% Discount Off](https://blogger.googleusercontent.com/img/b/R29vZ2xl/AVvXsEiELVpYkrlaJ1GR9kd02nnzZaEZmmnyyz8hPnhxEAdQUipjA4fkM7tQPcxylOrTZru4duAq3ySZ8CGAbSxFf9LRbyEaGINbAWlPUYoMeDdkwED7PbwOnNTYfnqQ7lTXe3KQG4q6HEXizVcc/s1600/irefone-half-price-facebook.jpg)
The Panasonic LUMIX DMC-GH4 is the world's first DSLM with 4K cinematic recording capability. Although the Panasonic GH4 offers us a wide choice for video recording format, it seems that the post-production is not as easy as we image. If you want to edit the 4K videos Panasonic GH4 record, you may find the high quality video files(no matter in MP4 or MOV format) are not recognized by most editing software including Sony Vegas Pro. So, how to convert/import Panasonic GH4 4K raw footage to Vegas Pro? Is there software can do the job?
The answer is positive. To get Sony Vegas Pro to work with Panasonic GH4 4K clips smoothly, you just need Brorsoft Video Converter to help you. It is the solid tool to help users to transcode 4K video files like 4K XAVC, XAVC S, MP4, MOV, etc to any format you want. It offers the optimal preset profiles for Sony Vegas Pro, Avid Media Composer, Adobe Premiere Pro, Pinnacle Studio and more. And there is no need to worry about the quality loss. Just download it and follow a simple tutorial below to import Panasonic GH4 footage into Sony Vegas Pro for editing smoothly.
Encoding Panasonic GH4 4K MOV/MP4 files to MPEG-2 for Sony Vegas Pro
Step 1: Add source video files
Install and launch the 4K video converter and load source MP4 or MOV clips to it.
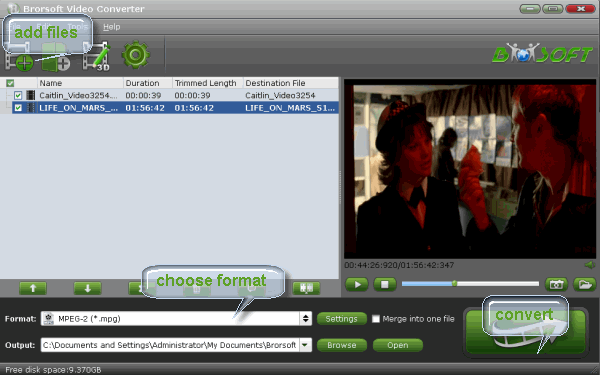
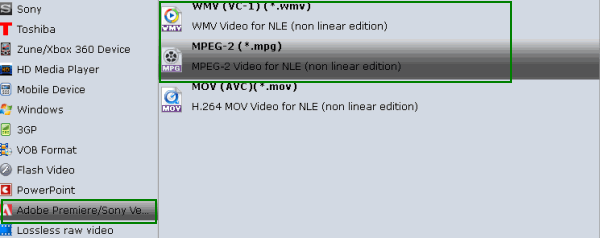
Step 2: Choose output format
Click “Format" pull down list to select Adobe Premiere/Sony Vegas> MPEG-2(*.mpg) as the best video format for Sony Vegas Pro. WMV, MOV formats are the good choice as well.
Tip - Profile Settings:
In case the default settings do not fit your requirement, you can click “Settings" button and enter “Profile Settings" panel to adjust video size, bit rate, frame rate, sample rate and audio channels.
Step 3: Start Panasonic GH4 4K video conversion
Click “Convert" button to start converting Panasonic GH4 4K MOV/MP4 to MPEG-2 for importing to Vegas Pro 11/12/13. When the conversion task is finished, click “Open" button to get the exported files and then import the converted 4K files into Sony Vegas Pro to do further editing.
Additional Tips:
If you want to smoothly edit Panasonic GH4 4K footage in Adobe Premiere Pro, you just need to choose Adobe Premiere/Sony Vegas> MPEG-2(*.mpg) as output; For Avid Media Composer, choose "Avid Media Composer > Avid DNxHD(*.mov)" as output; For Windows Movie Maker, choose HD Video -->WMV HD(*.wmv) as output.
More Guides:
Rip Blu-ray for Playback with Roku 3
How to Rip your Blu-ray collection for Roku 3
Extract DVD Chapters from DVD Movies on Mac
Import and Edit 4K video with Adobe Premiere Pro
Importing Nikon D810 MOV in Sony Vegas Pro 12/13
Take 4K MP4 off Panasonic FZ1000 to Adobe After Effects
No comments:
Post a Comment